Similar to text notes, you can place a note whose text is a raw JSON object on the layout – e.g. {"kind": "station", "id": "WP"} – instead of free-form text. This is meant for structured, machine-readable annotations (station/industry/siding metadata and similar) that external tools can read directly, rather than parsing free-form text.
After releasing the mouse button, the JSON Note Editor dialog is displayed, with Validate and Format buttons alongside the text area.
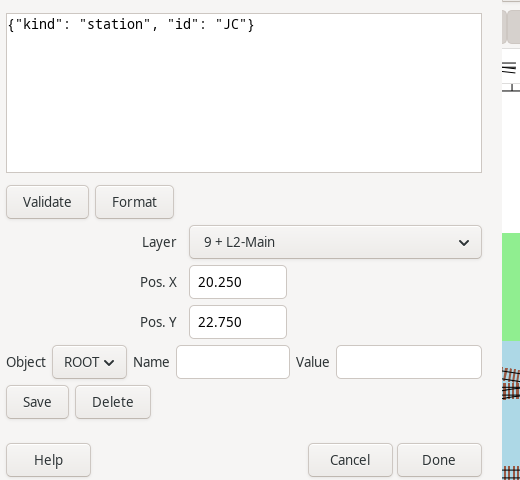
Validate checks that the current text is well-formed JSON and that it's a JSON object ({...}, not a bare array, string, number, or boolean) – invalid text is highlighted and the Done button is disabled until it's fixed, the same way an invalid document path already blocks Done on the Document Editor (Document).
Format pretty-prints the current text (re-indents it for readability) if it's currently valid; if not, it reports the same error Validate would.
There is no fixed schema – any valid JSON object is accepted, and unknown fields are always preserved rather than rejected. A "kind" field, when present, is shown on the status line and used by other tools to group notes.
For operational metadata (stations, industries, sidings, and similar), a documented naming convention for "kind" values and their fields – including how a note relates to the layer or railroad it belongs to on a multi-entity layout – is planned as part of an upcoming Operations design session, and will be described in that future Operations section of the User Guide once it exists. Until then, "kind" is just a free-form label; nothing in JSON Note itself enforces any particular value or field set. A couple of illustrative examples of the kind of thing this could look like: {"kind": "station", "id": "WP"} or {"kind": "industry", "id": "QM1", "station": "WP"}.
Structured field editor
Below the text area, an Object/Name/Value row with Save and Delete buttons lets you add, change, or remove one name-value pair at a time without hand-typing JSON syntax. This is a formatting aid for simple values, not a full JSON editor – arrays and anything more complex than a single value still need to be typed directly into the text area.
- Object selects which object the edit applies to: ROOT (the note's own top-level object) or any object nested one level directly inside it. It only lists objects that already exist in the current text, so it always starts at ROOT for a new note.
- Name is the field name to add, change, or remove.
- Value is the field's new value. It is entered as plain text, not JSON – type WP to store the string "WP", no quotes needed. A value that reads as a plain number, true, false, or null is stored as that, e.g. entering true for Name terminus stores the boolean true, not the string "true".
- Leaving Value blank and clicking Save creates a new, empty nested object under that Name instead of an empty string – e.g. with Object ROOT, Name spots, and Value left blank, Save adds "spots": {}. That new object then appears as a second choice in the Object dropdown, so you can select it and use the same row to fill it in, e.g. Name tank / Value 1 then Name box / Value 2 to build "spots": {"tank": 1, "box": 2} one field at a time.
- Save adds Name to the selected Object if it isn't already present, or updates its value in place if it is.
- Delete removes Name from the selected Object. To delete an entire nested object (not just one of its fields), select ROOT (or whichever object contains it) rather than the object itself, enter its name, and click Delete – e.g. with Object ROOT and Name spots, Delete removes the whole "spots": {...} entry, contents included, in one action.
When in Properties (Properties) mode, clicking on a JSON Note will display the Property Sheet to let you read or modify its JSON text.
On the canvas, a note draws as a small colored marker, its color and shape distinguishing a JSON Note from a Text/Weblink/Document note at a glance, without clicking each one. The color and shape for each note type can be customized in the Manage Notes dialog (Manage Notes Dialog).